Create AI Animations with One Photo Using Magic Animate
- Jul 26, 2024
- 6 min read
The world of digital animation has taken a giant leap forward with the introduction of the new stable image video model. This groundbreaking technology allows users to animate a single photo, opening up exciting possibilities for content creators and artists alike. By harnessing the power of advanced AI algorithms, this innovative tool has the potential to revolutionize the way we bring static images to life.
In this article, we'll explore the ins and outs of using the new stable image video model to animate. We'll begin by explaining how to get started with MagicAnimate, drawing on insights from magic research and Stable Diffusion. Then, we'll delve into mastering the animation process with simple clicks. We'll also examine advanced techniques for creating realistic animations, touching on concepts such as DensePose and CodeFormer. By the end, readers will have a comprehensive understanding of how to leverage this powerful diffusion model to create stunning AI-driven animations from a single photograph.
Unlocking the Magic of AI Animation: Introducing MagicAnimate

MagicAnimate is not just another animation tool. It's a cutting-edge diffusion-based framework that allows you to create human image animations with remarkable temporal consistency. In simpler terms, it can bring a single static image to life using a motion sequence, all while maintaining the essence of the original image. It's like giving a photograph the ability to dance!
What sets MagicAnimate apart is its versatility. Whether you're working with a standard photograph, an oil painting, or even a render of a movie character, MagicAnimate can animate it. It can even work with text-prompted images generated by AI models like DALLE3. The possibilities are truly exciting.
So, how do you harness this magic? Let me guide you through the process:
Reference Image: Start by selecting a single image you want to animate. This could be a portrait, a full-body shot, or even an artistic rendering. Upload this image to the "Reference Image" section of the MagicAnimate interface.
Motion Sequence: Next, you'll need a video that will dictate the movement of your animation. This goes into the "Motion Sequence" section. The clever part? This motion doesn't have to match your reference image perfectly - MagicAnimate is smart enough to adapt.
Fine-tune Your Settings: You have control over several parameters:
Random seed: This affects the randomness in the animation. Try different values to see varied results.
Sampling steps: Generally, more steps can lead to better quality, but will take longer to process.
Guidance scale: This influences how closely the animation follows the motion sequence.
Animate: Once you're happy with your settings, hit the "Animate" button and watch the magic unfold.
Refine and Experiment: Don't be afraid to try different combinations. Maybe that portrait of your grandmother would look amazing with a modern dance sequence!
Remember, the key to mastering MagicAnimate is experimentation. Each combination of reference image and motion sequence can yield surprisingly delightful results. So, whether you're a digital artist looking to push boundaries, a content creator seeking to engage your audience in new ways, or simply someone fascinated by the possibilities of AI, MagicAnimate offers an exciting new canvas for your creativity.
As we stand on the brink of this new frontier in animation, one thing is clear: the line between static and dynamic imagery is blurring, and tools like MagicAnimate are leading the charge. So why not give it a try? Your next great animation could be just a single image away!
Advanced Techniques for Realistic Animations
To achieve highly realistic animations using the new stable image video model, several advanced techniques can be employed. These include utilizing DensePose for improved results, implementing face restoration with CodeFormer, and upscaling and enhancing the output quality.
Using DensePose for Better Results

DensePose is a powerful tool that can significantly enhance the realism of animations generated by the stable image video model. By generating DensePose videos from any footage, standard videos can be transformed into the DensePose format 5. This process involves using DaVinci Resolve for video cropping, zooming, and exporting, preparing the footage for conversion into the DensePose format.
Incorporating DensePose into the animation workflow allows for more accurate and lifelike movements, as it captures the intricate composition and contextual information inherent in the input images 6. This technique is particularly effective when working with human subjects, as it enables the model to better understand and replicate the nuances of human motion.
Implementing Face Restoration with CodeFormer
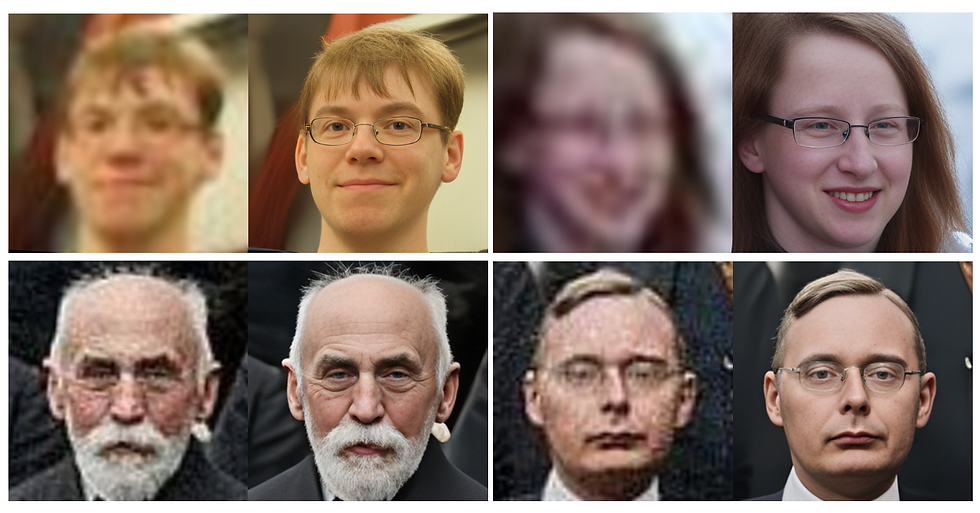
CodeFormer is a powerful tool for blind face restoration, which involves restoring degraded facial images without a clear reference 6. By integrating CodeFormer into the animation pipeline, it becomes possible to enhance the quality and realism of facial animations.
The CodeFormer model learns a discrete codebook and a decoder via self-reconstruction learning, allowing it to store high-quality visual parts of face images 6. Additionally, a Transformer module is introduced for code sequence prediction, modeling the global face composition of low-quality inputs.
To fully utilize CodeFormer's potential, it is crucial to understand its settings, such as scale, fidelity, background, and faces 6. Adjusting these parameters can significantly impact the quality and appearance of the restored facial images, leading to more realistic and visually appealing animations.
Upscaling and Enhancing Output Quality
Upscaling and enhancing the output quality of animations generated by the stable image video model is essential for achieving realistic results. This process involves increasing the resolution of the generated images to provide greater detail and clarity 6.
CodeFormer face restoration is capable of video upscaling and face improvement 5. By leveraging this tool, it becomes possible to enhance the visual quality of the animations, resulting in more lifelike and visually stunning outputs.
When upscaling and enhancing the output quality, it is important to consider factors such as the desired level of detail, the computational resources available, and the intended use of the animations. Striking the right balance between these factors can help optimize the results and ensure that the animations meet the desired quality standards.
By combining these advanced techniques - DensePose for improved motion capture, CodeFormer for face restoration, and upscaling and enhancement for higher output quality - it becomes possible to create incredibly realistic animations using the new stable image video model. These techniques, when used in conjunction with the powerful capabilities of the diffusion model, open up new possibilities for generating lifelike and visually stunning animations from a single input image.
Conclusion
The new stable image video model has ushered in a revolution in digital animation, allowing creators to bring static images to life with impressive realism. By harnessing the power of advanced AI algorithms, this technology opens up a world of possibilities to animate a single photo. From setting up the necessary tools to mastering the animation process and employing advanced techniques, users now have the means to create stunning visual content that pushes the boundaries of creativity.
As we look ahead, the potential applications of this technology are vast and exciting. Whether it's to breathe new life into old photographs, create engaging social media content, or develop innovative art installations, the stable image video model is poised to transform how we interact with and create visual media. As more creators explore and push the limits of this tool, we can expect to see even more groundbreaking and awe-inspiring animations emerge, further blurring the line between static and dynamic imagery.
FAQs
Q: How can I create an AI animation from a photo?
A: To create an AI animation from a photo, you can use various online tools or software that support AI-driven animation features. Typically, you would start by uploading your photo, then use the tool's features to animate the image according to your preferences.
Q: What are the steps to make an AI video using a single picture?
A: To create a video from a single photo using AI, follow these steps:
Input your text or script that will accompany the video.
Choose and personalize the AI voice to narrate your video.
Upload your photo(s) that will be featured in the video.
Preview the video to make sure it meets your expectations, then export the final product.
Q: How do I animate a picture using Stable Diffusion?
A: To animate a picture with Stable Diffusion, follow these steps:
Go to the "Make Animation" option in your chosen application.
Upload your Stable Diffusion image from your photo library.
Select a video to drive the animation or create a new one using your camera.
Wait for the animation to process, then view your animated picture.
Q: What is the process to animate a single image?
A: To animate a single image, you can use a platform like Canva by following these steps:
Open Canva on your desktop browser or mobile app.
Upload the photo you want to animate by selecting the Uploads tab.
Choose your photo and click on the Animate option.
Customize the animation settings as desired.
Download and share your newly animated photo.
References
[3] - https://medium.com/@AIBites/stable-video-diffusion-convert-text-and-images-to-videos-e0f41b7f6986